Account Pages
Installation
Enable modules
Make sure you have installed vactory_decoupled_espace_prive, vactory_decoupled_router_default_pages modules.
When you activate the vactory_decoupled_espace_prive, you will have access to a set of widgets (such as login, register, reset password) that you can integrate into each account page that is required for your Next app.
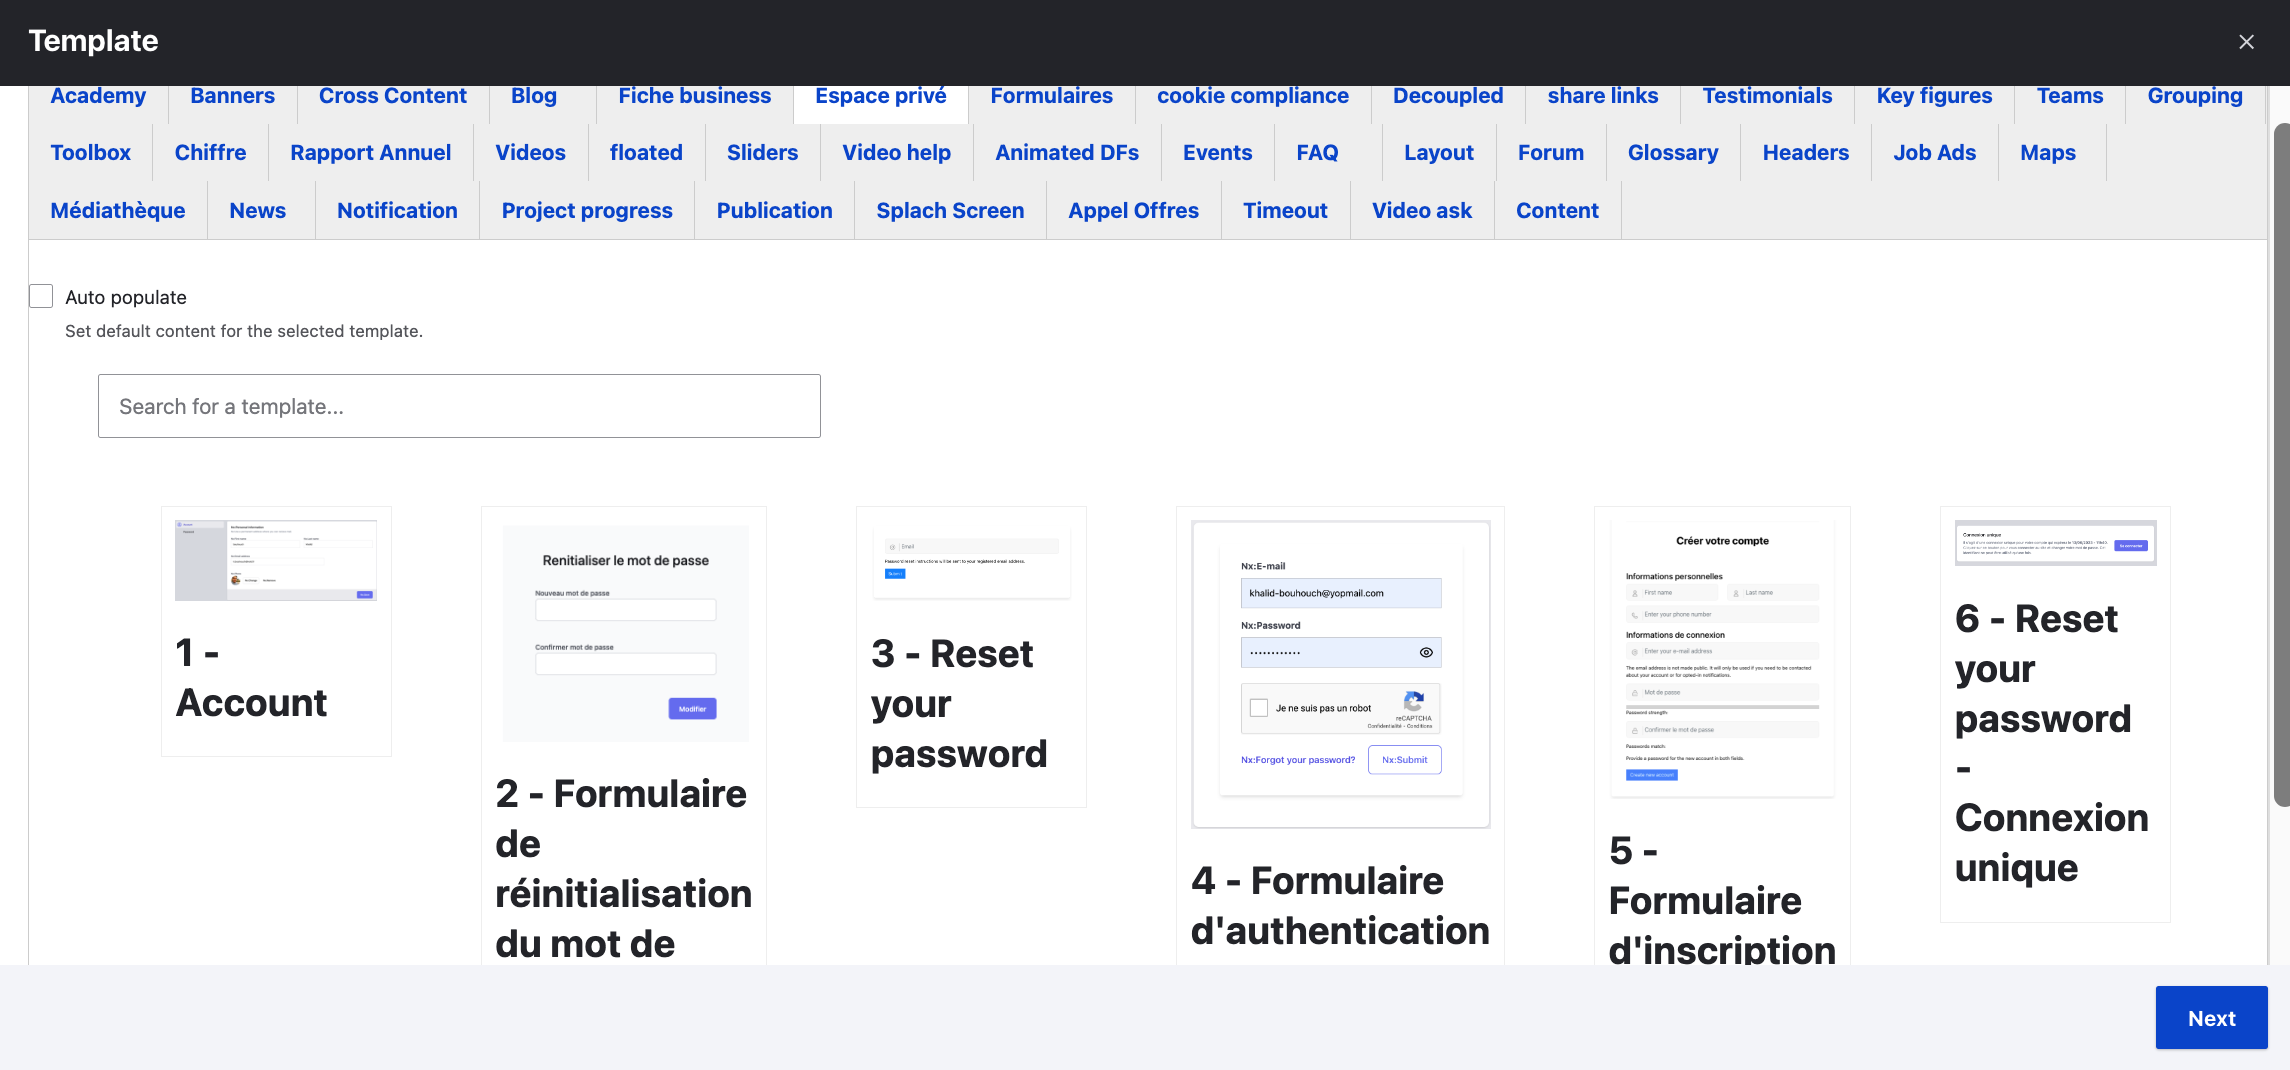
Enabling the vactory_decoupled_router_default_pages feature will automatically generate all the necessary node account pages for you.
Generate keys
Generate a pair of keys to encrypt the access tokens.
- Visit
/admin/config/people/simple_oauth - Click Generate keys to generate encryption keys for tokens
- Fill in Directory for the keys. For example a relative path like ../
- Click Generate
- Click Save configuration
You can also use openssl to generate keys in the directory you used above:
openssl genrsa -out private.key 2048 openssl rsa -in private.key -pubout > public.keyCreate Consumer
If there are no existing consumers, please create a new one.
- Visit
/admin/config/services/consumer/add - Fill in the following values:
- Label:
Vactory NextJs App - Secret:
Your secret
- Click Save
Integration
Add the following lines to your NextJs app .env file and ensure that you provide the appropriate values.
OAUTH_CLIENT_ID=uuidOAUTH_CLIENT_SECRET=secretLogin
To add the authentication form widget, you can edit the Login node and integrate the desired authentication widget.
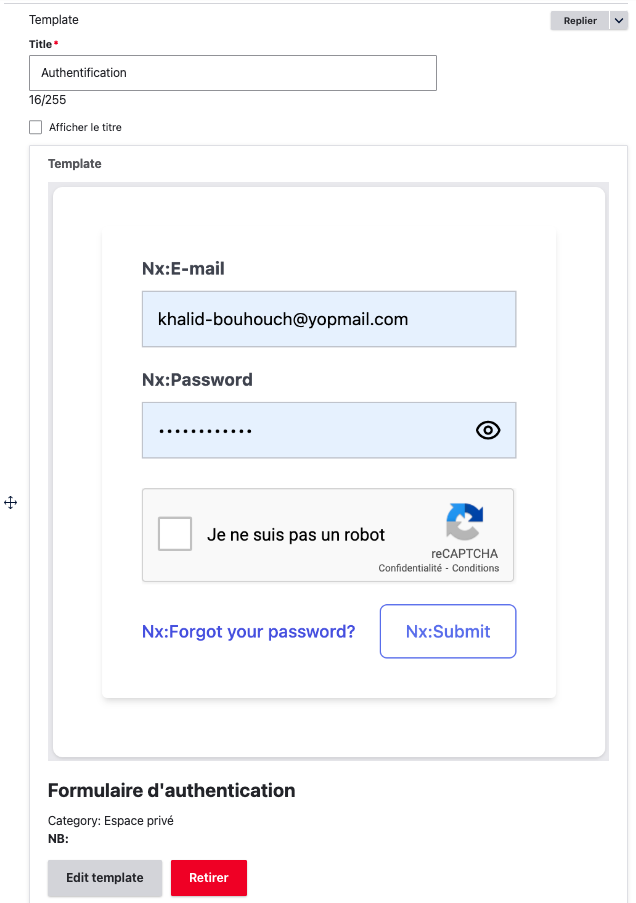
Congratulations! You can now visit /account/login to see that your login page is functioning correctly.
To customize the login form you can edit : ./components/modules/contrib/account/AccountLoginWidget.jsx
KEYCLOAK Provider
Keycloak is an open-source Identity and Access Management solution making easy to secure applications and services with little to no code
Users authenticate with Keycloak rather than individual applications. That means that your applications don't have to deal with log-in forms, authenticating and storing users.
Keycloak supports standard protocols for authorization and authentication as OAuth 2.0, OpenID Connect SAML. You can choose which mechanism you want to use to secure your application. If you wish, you can also choose to secure some with OpenID Connect and others with SAML.
Reference : https://tomas-pinto.medium.com/keycloak-clients-and-roles-a-tutorial-b334147f1dbd
Add the following lines to your NextJs app .env file and ensure that you provide the appropriate values.
KEYCLOAK_ID=vactoryKEYCLOAK_SECRET=123456KEYCLOAK_ISSUER=https://keycloak.lecontenaire.com/auth/realms/devGoogle Provider
Documentation : https://developers.google.com/identity/protocols/oauth2?hl=fr
Add the following lines to your NextJs app .env file and ensure that you provide the appropriate values.
FACEBOOK_CLIENT_ID=FACEBOOK_CLIENT_SECRET=Facebook Provider
Documentation : https://developers.facebook.com/docs/facebook-login/manually-build-a-login-flow/
Add the following lines to your NextJs app .env file and ensure that you provide the appropriate values.
GOOGLE_CLIENT_ID=GOOGLE_CLIENT_SECRET=Register
To add the sign up form, you can edit the Register node and integrate the related widget.
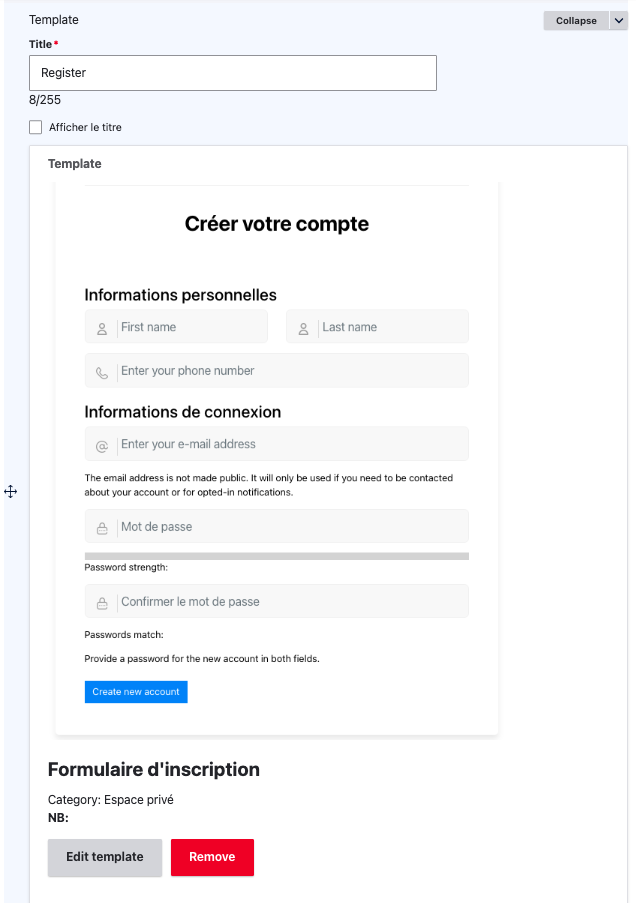
Congratulations! You can now visit /account/register to see that your sign up page is working correctly.
However, you may be wondering how to add additional fields to your form.
It's important to note that the sign-up form you see in your NextApp is essentially a WebForm.
So in order to add an extra field, you can just edit the webform by accessing : /admin/structure/webform/manage/vactory_espace_prive_register.
But, before that you should first add the field to the user entity at : /admin/config/people/accounts/fields.
To customize the register form style you can edit : ./components/modules/contrib/account/AccountRegisterWidget.jsx
Account Profile
To add the account profile form, you can edit the Account node and integrate the related widget.

You can now visit /account to see that your Account page is working correctly.
To customize the account profile you can edit the following files :
./components/modules/contrib/account/AccountWidget.jsx./components/modules/contrib/account/AccountEdit.jsx./components/modules/contrib/account/AccountEditPassword.jsx
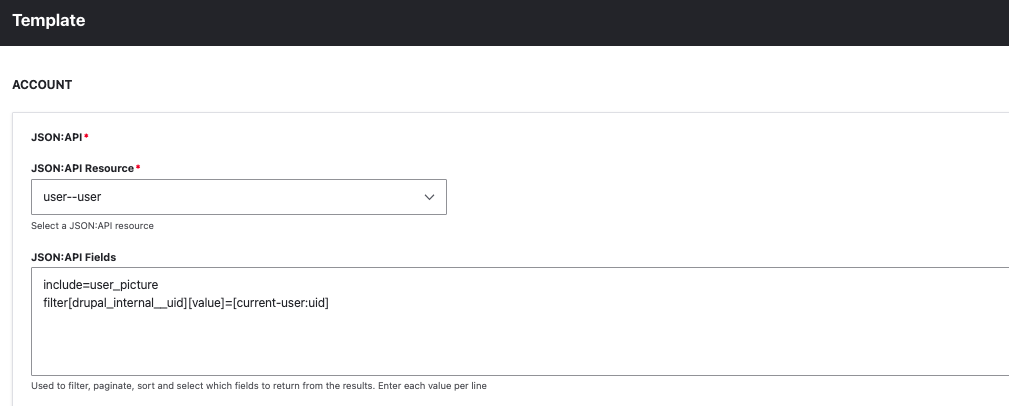
To populate the form with the connected user's data, you can modify the injected widget and incorporate any required filters according to the JSON API standard.
Reset Your Password
To add the account reset password form, you can edit the Lost Password node and integrate the related widget.
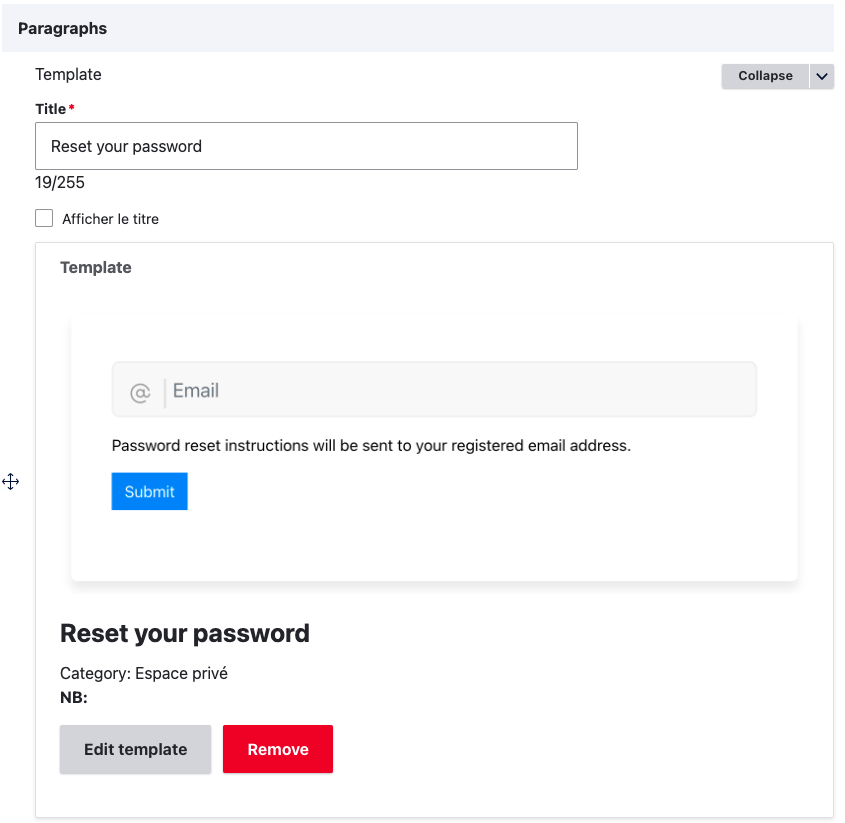
You can now visit /account/lost-password to see that your Account reset password is working correctly.
To customize the form you can edit : ./components/modules/contrib/account/AccountLostPasswordWidget.jsx
One-time Login
Once the user submits the reset password form, they will receive an email containing a one-time login link.
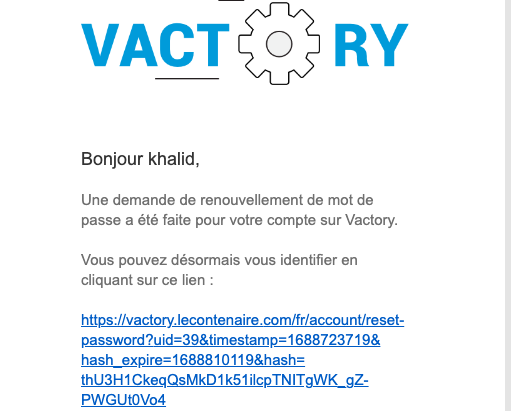
By clicking the provided link, the user will be redirected to a one-time login page.
In order to integrate the corresponding template, you can edit the Reset Password node and inject the relevant widget.
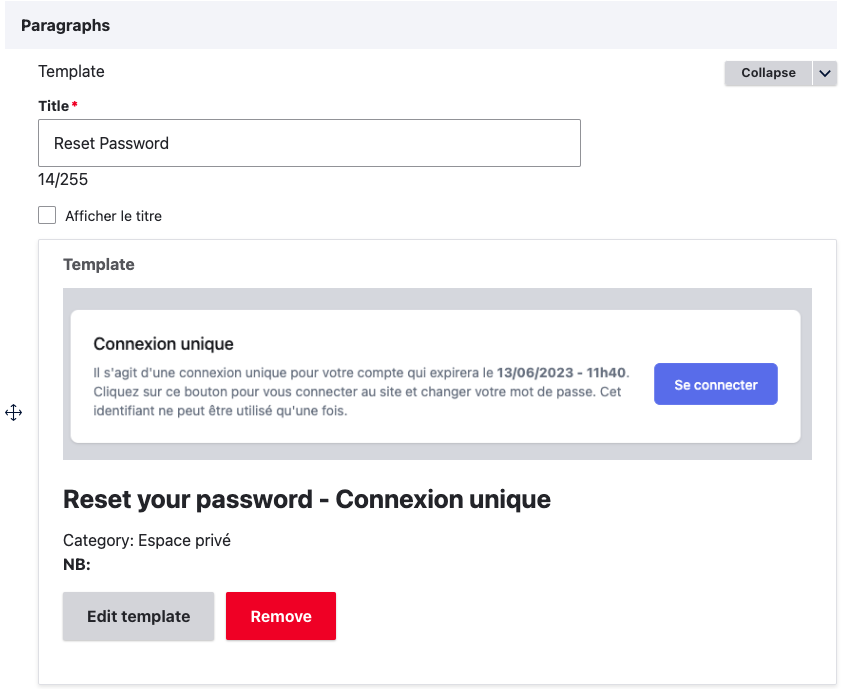
To customize the template you can edit : ./components/modules/contrib/account/AccountResetPasswordWidget.jsx
Forget Password
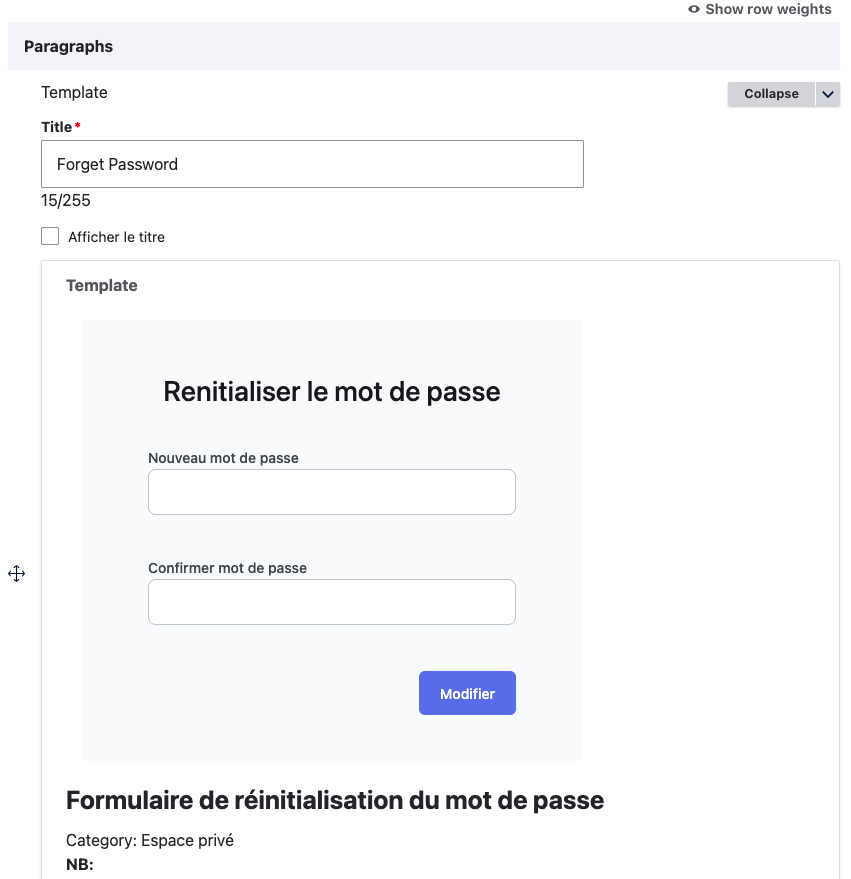
After utilizing the one-time login form, the user will be automatically logged in and redirected to the forgot password page, enabling them to modify their password.
In order to integrate the corresponding template, you can edit the Forget Password node and inject the relevant widget.
One Time Password (OTP)
The OTP Authentication feature provides a secure and convenient way to verify user identity using One-Time Passwords. Users receive a unique OTP via SMS or email, which they must enter during the authentication process.
Install vactory_otp module:
drush en vactory_otpdrush updbAdd OTP widget to login page:
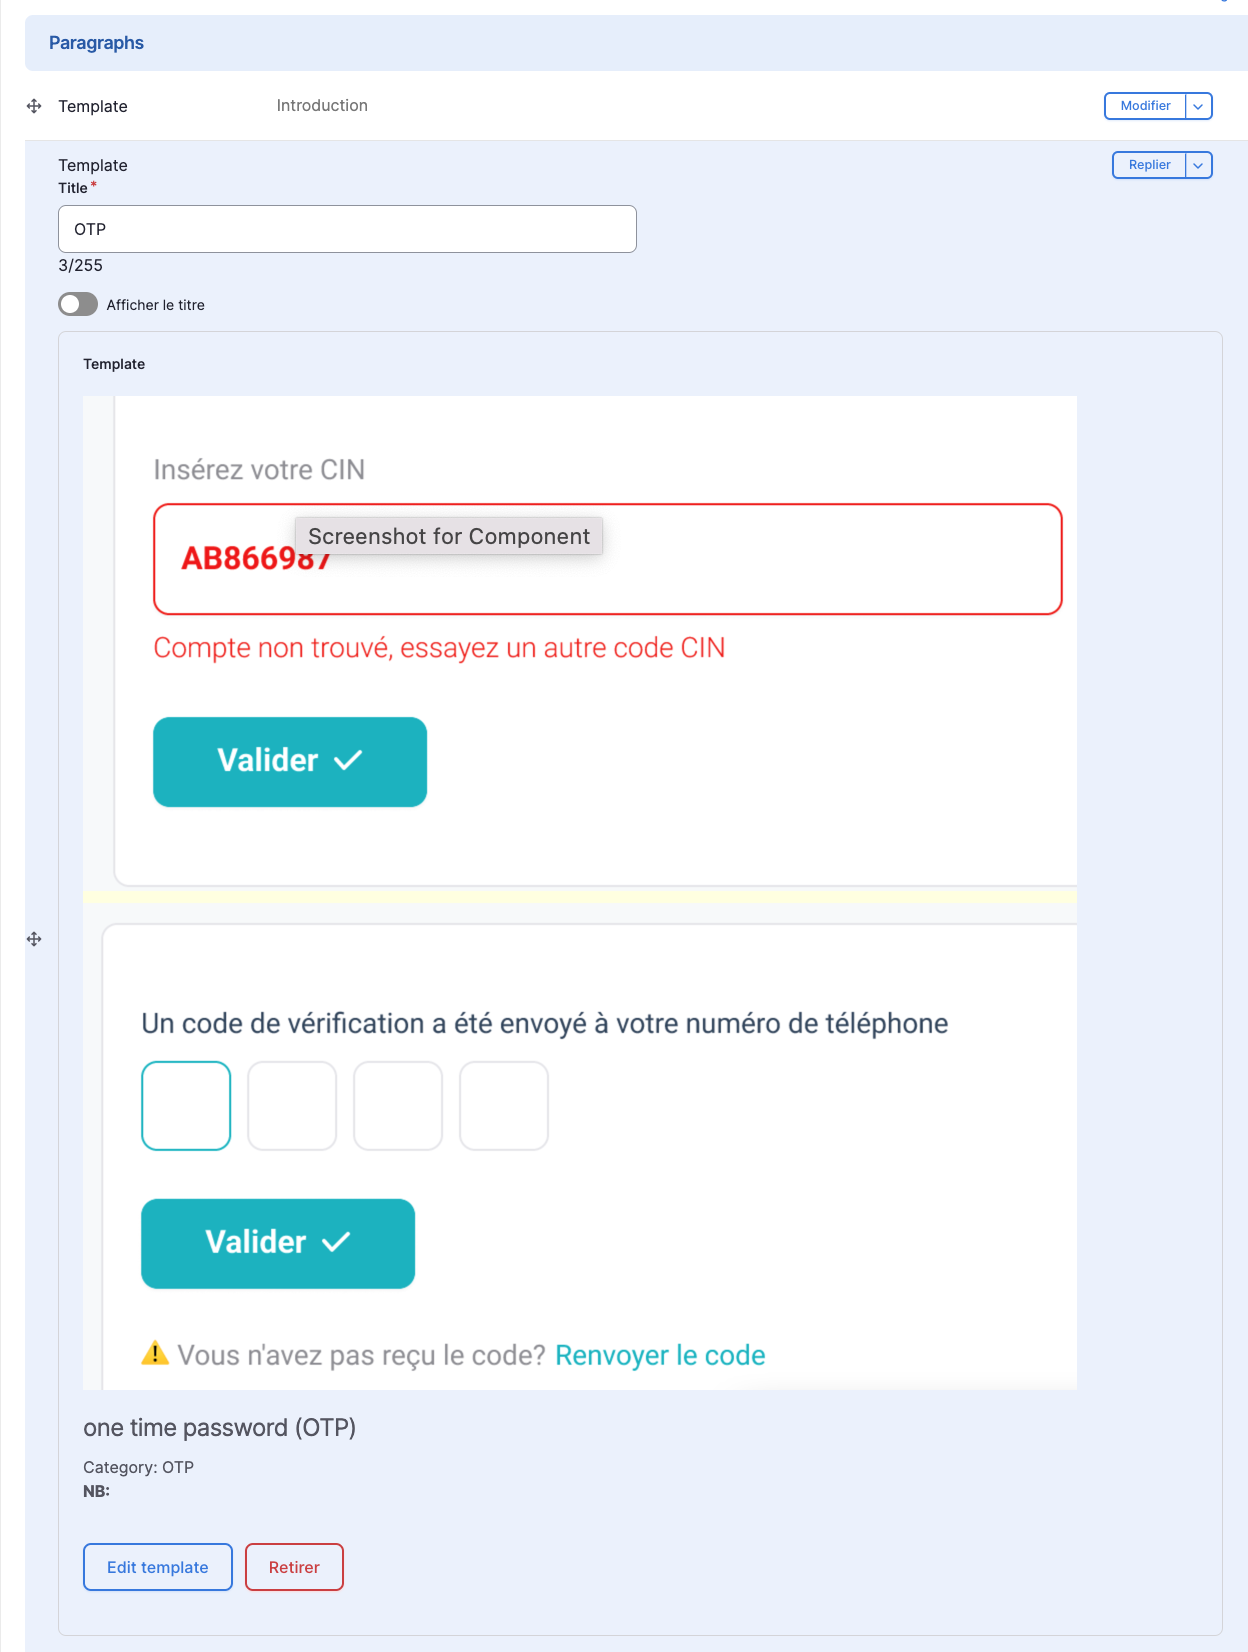
Configuration:
1 - visit /admin/config/development/vactory_otp_settings_form
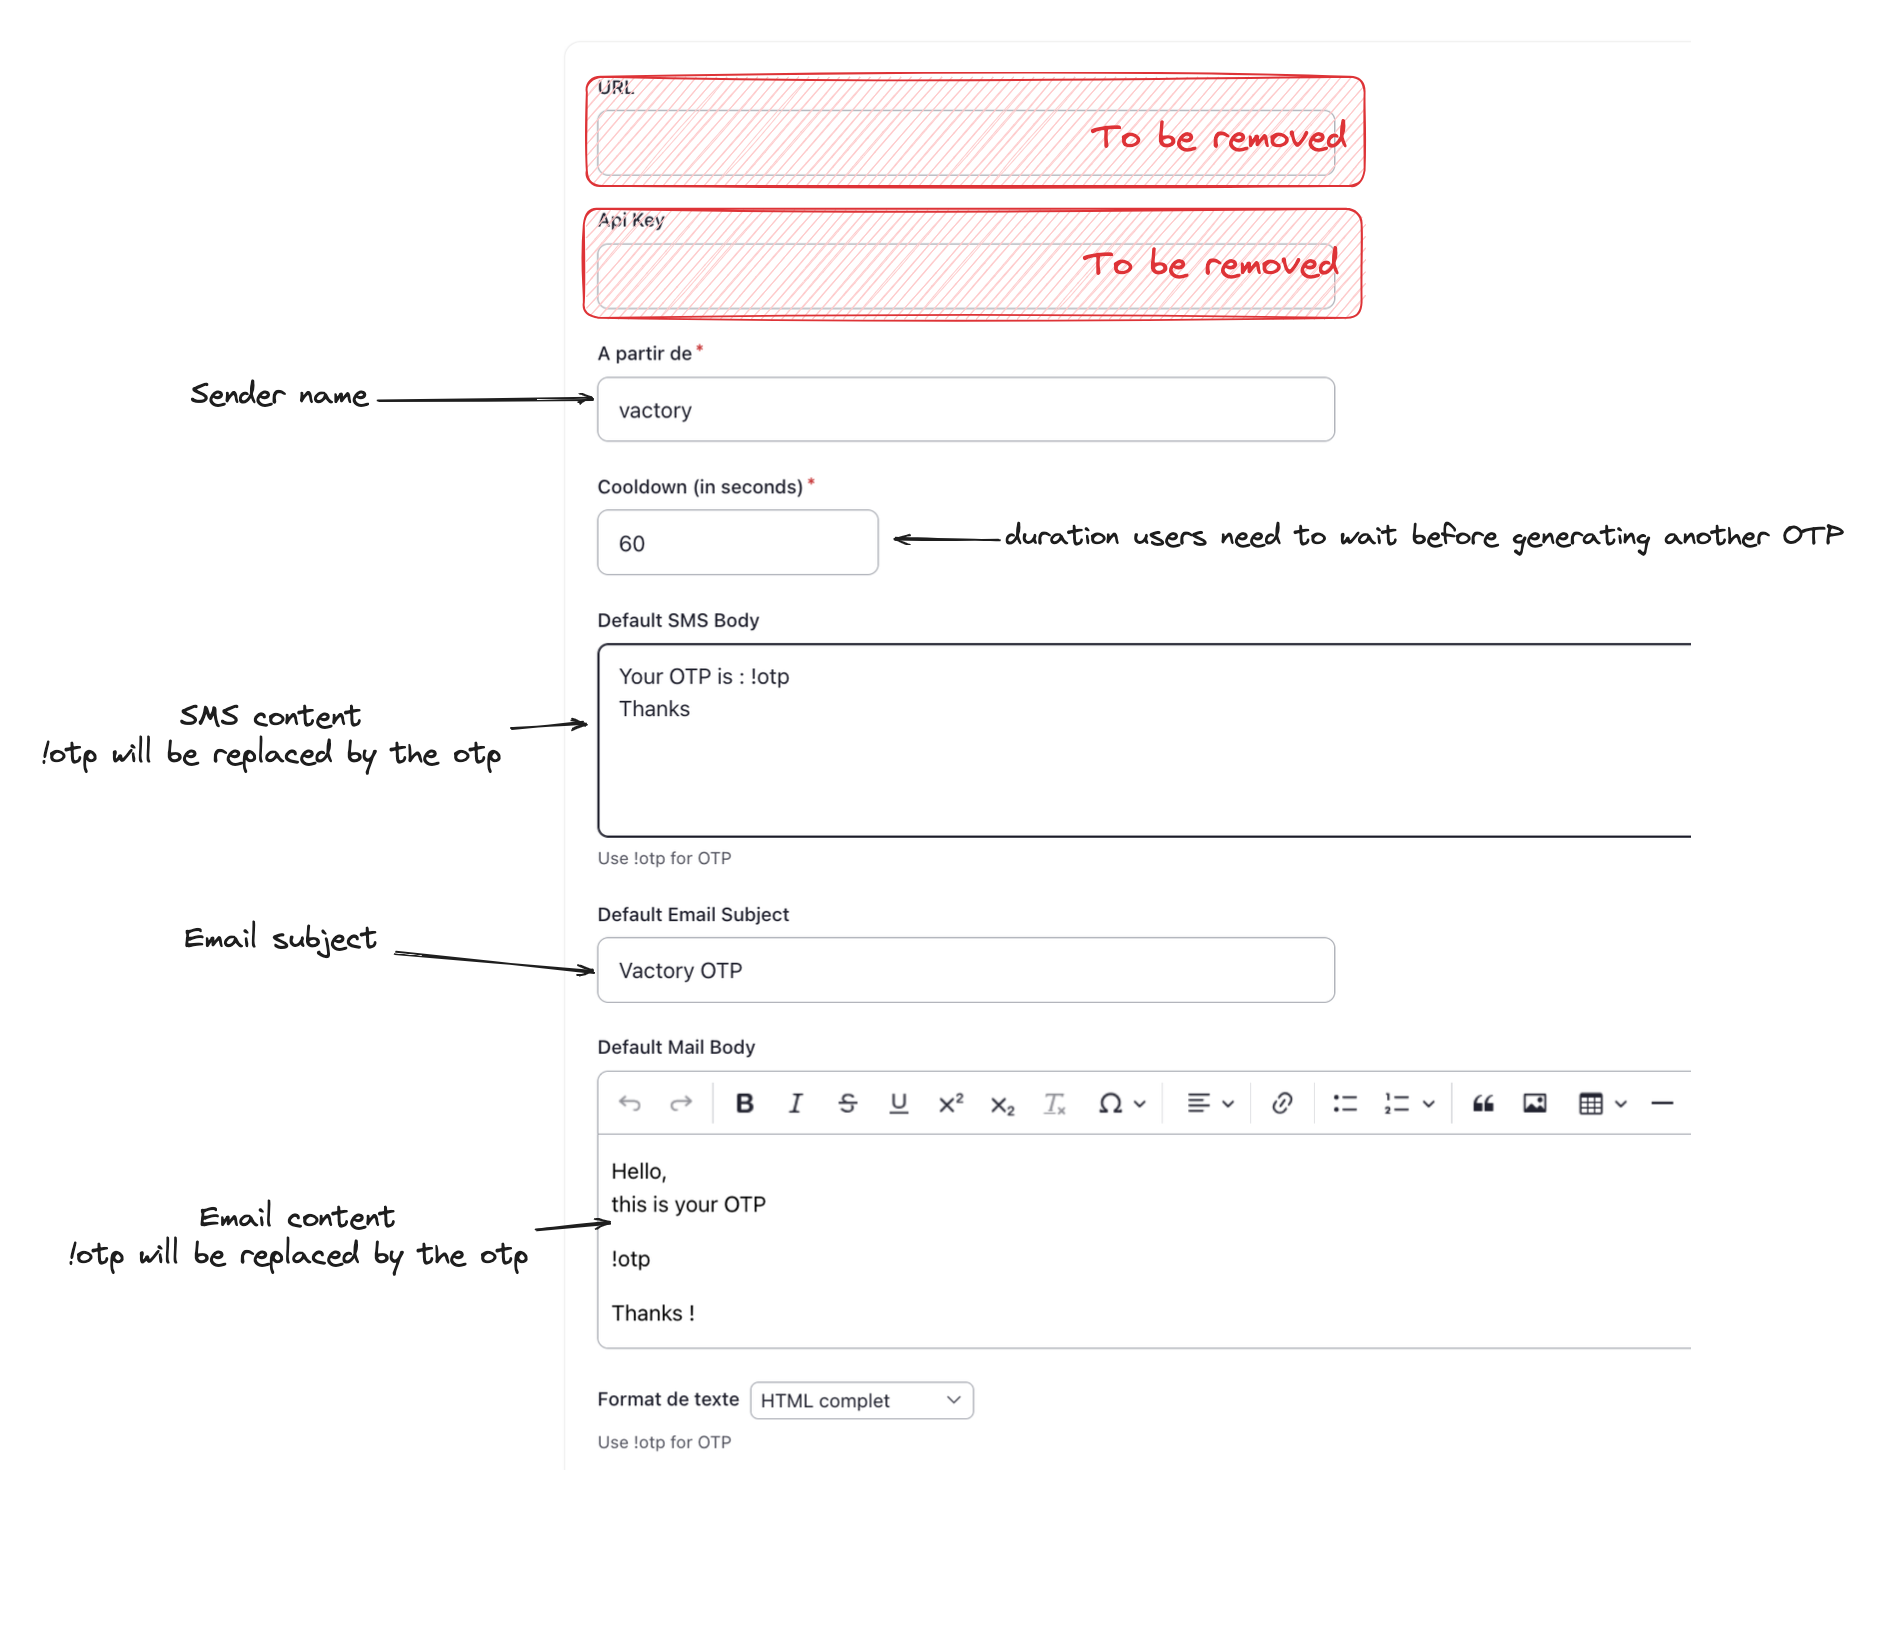
2 - visit /admin/config/development/vactory_otp_login_settings
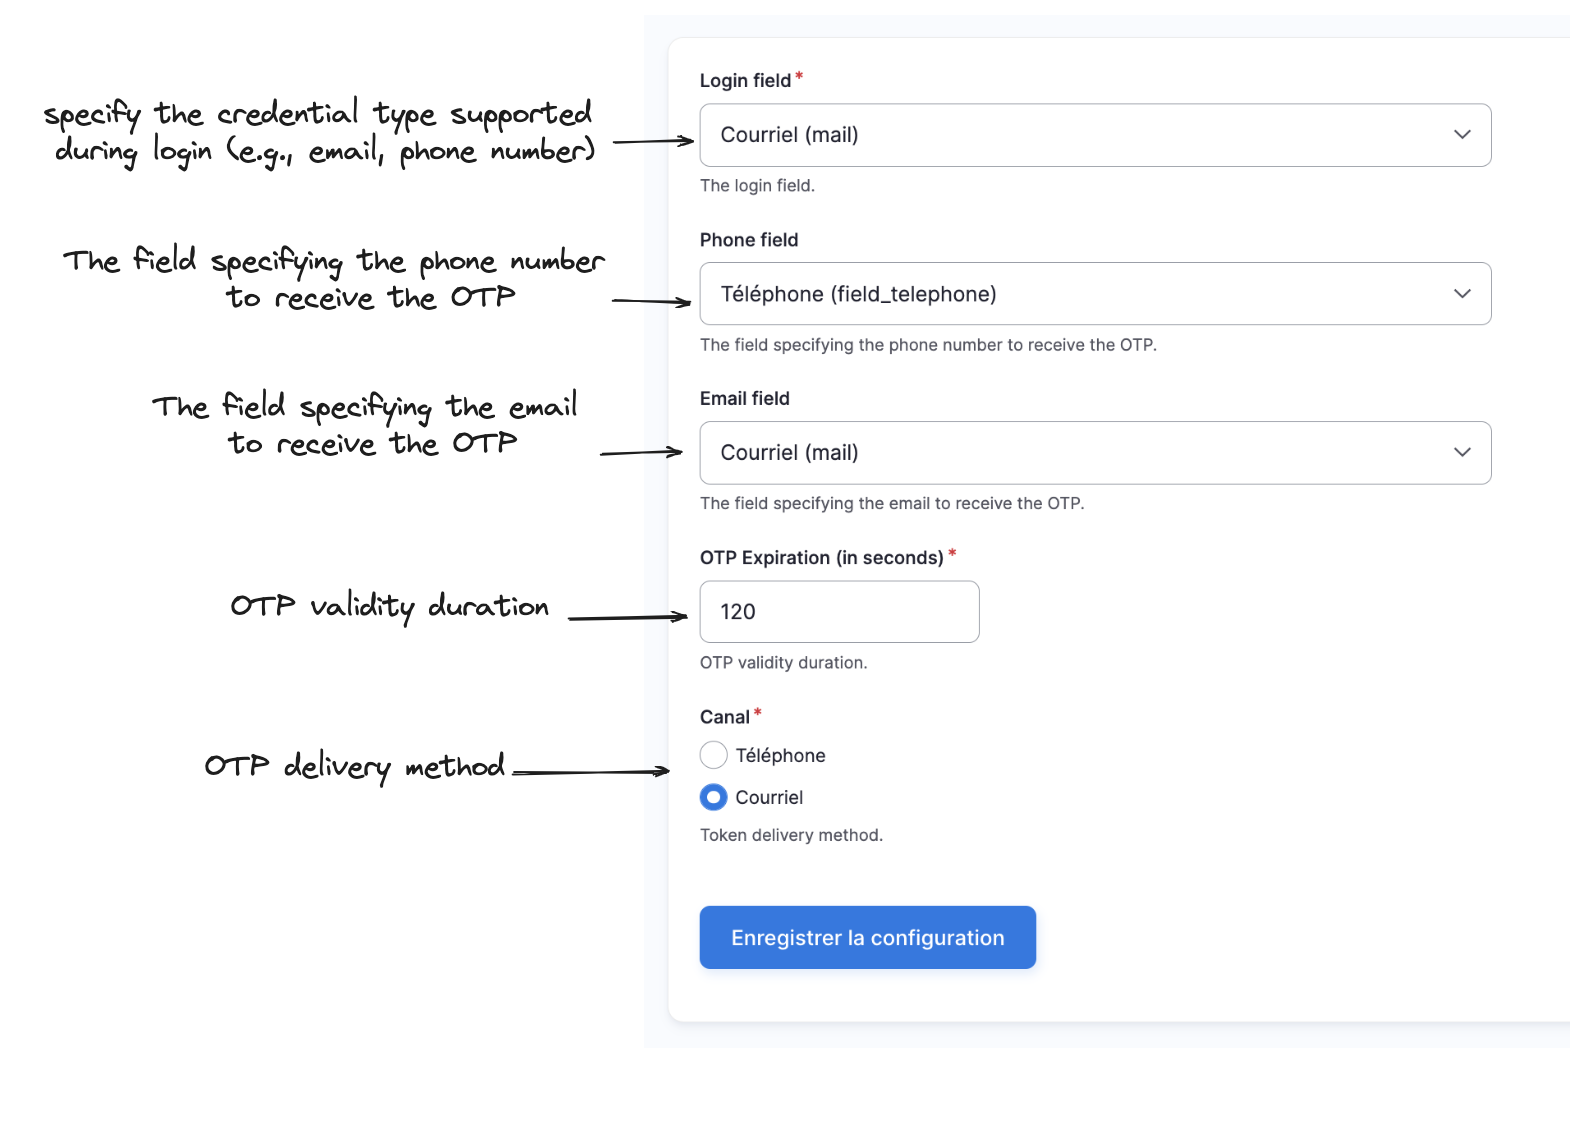
Finally, You can visit /account/login to see that your OTP is working correctly. Type in your login credentials, and you will receive an OTP via your chosen channel (email/SMS).
useAccount Hook
The useAccount hook is a custom hook designed for user account management.
Here's a breakdown of each functionality provided by this hook:
isAuthenticated: Returns a boolean value indicating whether the user is authenticated based on the session status.
isLoading: Returns a boolean value indicating whether the session is still loading.
profile: Stores the session data for the currently authenticated user.
loginUrl: Constructs the login URL, including a callback URL, used for user authentication.
loginUrlNoCallback: Constructs the login URL without a callback URL.
lostPasswordUrl: Constructs the lost password URL for recovering a forgotten password.
registerUrl: Constructs the registration URL for creating a new user account.
accountUrl: Constructs the account URL for accessing user account details.
signIn: A function that redirects the user to the login page.
signUp: A function that redirects the user to the registration page.
getUsernameByEmail: An asynchronous function that retrieves a unique username associated with a given email address from the Drupal.
createUser: An asynchronous function that sends a POST request to the Drupal API to create a new user.
updateUserSession: An asynchronous function that updates the user session by making a GET request to the
/api/auth/session?updateendpoint.resetUserPassword: An asynchronous function that sends a POST request to the Drupal API to reset a user's password.
Example
import { useAccount } from "@vactorynext/core/hooks"
export const Test = () => {    const { isAuthenticated, profile } = useAccount()
    if (isAuthenticated) {        return <h1>Hello {profile?.field_first_name}</h1>    }
    return <p>...</p>}
Add additional user data to the profile constant
At present, the user field data that can be extracted from the profile constant is limited
to the information contained in the access token provided by Drupal.
./profiles/contrib/vactory_starter_kit/modules/vactory_decoupled/vactory_decoupled.module
function get_oauth_user_infos(UserInterface $user) {  ...
  return [    'id' => $user->id(),    'uuid' => $user->uuid(),    'email' => $user->getEmail(),    'username' => $user->getAccountName(),    'avatar' => $avatar,    'first_name' => $first_name,    'last_name' => $last_name,    'full_name' => $full_name,    'name_initial' => _auth_generate_intials_from_name($full_name),    'roles' => $user->getRoles(),    'isActive' => $user->isActive(),    'isBlocked' => $user->isBlocked(),  ];}
/** * Implements hook_simple_oauth_private_claims_alter(). */function vactory_decoupled_simple_oauth_private_claims_alter(&$private_claims, AccessTokenEntity $access_token_entity) {  $user_id = $access_token_entity->getUserIdentifier();  /** @var \Drupal\user\UserInterface $user */  $user = User::load($user_id);  $profile = [];  try {    $profile = get_oauth_user_infos($user);  }  catch (InvalidPluginDefinitionException $e) {  }  catch (PluginNotFoundException $e) {  }
  $private_claims = [    "profile" => $profile,  ];}
The hook_simple_oauth_private_claims_alter is a Drupal hook that allows developers to modify
or add custom claims to the private claims of the Simple OAuth module. Private claims are
additional data associated with an access token that are not part of the standard token
specification.
1st Method to add extras information
By implementing the hook_simple_oauth_private_claims_alter hook as mentioned earlier,
you can include additional data in the access token that is sent to the Next.js app.
This allows you to customize and extend the information available in the token, providing
extra data that can be utilized within the Next.js app for various purposes.
./modules/custom/your_custom_module/your_custom_module.module
use Drupal\simple_oauth\Entities\AccessTokenEntity;use Drupal\user\Entity\User;
/** * Implements hook_simple_oauth_private_claims_alter(). */function your_custom_module_simple_oauth_private_claims_alter(&$private_claims, AccessTokenEntity $access_token_entity) {    $user_id = $access_token_entity->getUserIdentifier();    /** @var \Drupal\user\UserInterface $user */    $user = User::load($user_id);    if (!empty($user->get('custom_field')->getString())) {        $private_claims['profile']['extra_field'] = json_decode($user->get('custom_field')->getString());    }}
Next, use the session NextAuth.js Callback to pass the extra value from the sign-in to the frontend,
client-side.
pages/api/auth/[...nextauth].js
...callbacks: { async session({ session, token, user }) { // Send properties to the client. session.user.extra_field = decoded.extra_field return session }}...reference: https://next-auth.js.org/getting-started/example
Security: Access tokens are typically used for authentication and authorization purposes. Including sensitive user information directly on the access token increases the risk of exposing confidential data if the token is compromised.
Token Size: Access tokens are typically sent with each request, and including extensive user information in the token can lead to larger token sizes. This can impact network performance and increase bandwidth usage, especially in distributed systems or when tokens are transmitted frequently.
Token Expiry: Access tokens often have an expiration time to enhance security. Including all user information directly in the token would require issuing a new token each time any user information changes, which can be inefficient and cumbersome.
2nd Method to add extras information
Edit the params constant in the [...nextauth].js file by specifying the user fields
you want to retreive. Ensure that the included user fields follow the conventions and requirements
outlined in the JSON API standard.
pages/api/auth/[...nextauth].js
export const params = { fields: { "user--user": "field_first_name,field_last_name,field_telephone", }, // include: "field_vactory_media,field_vactory_media.thumbnail",}